 masalladelcloud
If you use a mini PC or a repurposed laptop as a server, you probably only have one network port. Or maybe you have a powerful machine but don’t want to spend more money or lack the space to install a PCIe network card. This limitation can be a problem if you want to separate management traffic from VM and container traffic, or if you plan to virtualize a firewall like pfSense or OPNsense.
The most economical solution is to use a USB to Ethernet adapter. In this post, I’ll explain how to configure it to be stable and functional.
Requirements
- A USB to Ethernet adapter (preferably USB 3.0 for Gigabit speed).
- Access to your server console (SSH or web interface).
Step 1: Identify the Adapter
The first thing is to connect the adapter and see if the system recognizes it. Run the following command in the terminal:
dmesg -T | tail -n80
You should see a line mentioning “Realtek”, “ASIX”, or similar. In this example, we see that “ASIX” appears.
To see the name of the assigned network interface (e.g., enx... or eth1), use:
ip link showStep 2: Configuration in Proxmox
From the Web GUI of our Proxmox server, we must access “Datacenter/PVE/Network”.
We will see the following.
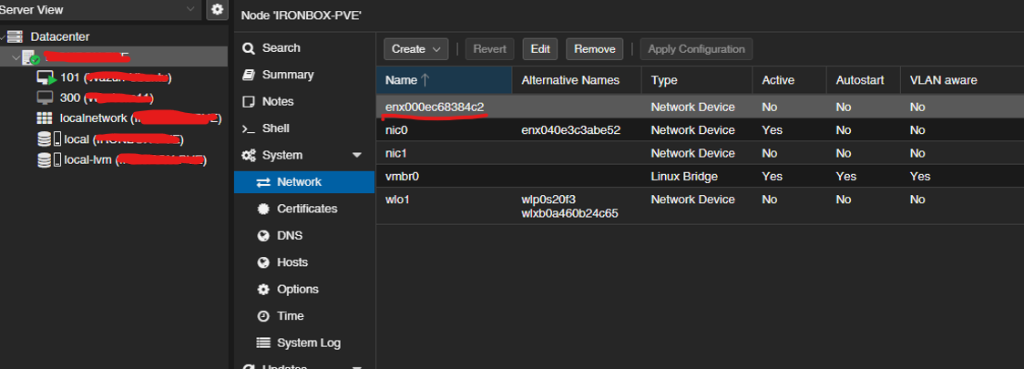
We will see that the name matches what appeared when running ip link show.
[!NOTE] Although the device appears in the list, you will see it listed as
Active: No. This is normal. To use it, you must create a Linux Bridge (e.g.,vmbr1) and assign it this port, or pass it directly to a VM.
Troubleshooting and Technical Considerations
Unpredictable network names
In modern Debian/Proxmox versions, USB cards take names based on their MAC address (e.g., enx001122334455). If you swap the physical adapter, the name changes, breaking your vmbr1. Use udev rules if you need a static name.
Poor performance on Gigabit adapters Most USB 3.0 adapters can reach 1Gbps, but if connected to a USB 2.0 port, they negotiate at a theoretical 480Mbps (around 30-40 MB/s real), heavily saturating the CPU with hardware interrupts (IRQ).
Perfect. With this, we have our USB to Ethernet adapter configured. Quick, easy, and simple. And as I always like to say: If this post has helped you, share it with other administrators who can benefit. And follow me for more real experiences from the homelab trenches.