 masalladelcloud
If you’re like me, your homelab never stops growing. You start with one server, then another, and suddenly you find yourself with the classic dilemma: Where do I put the data and where do I run the applications?
Lab Objective: Deploy Immich in an unprivileged LXC container within Proxmox, separating compute (LXC) from storage (external NAS via NFS). You will learn how to configure the exact UID/GID permissions so the container can read and write to the NAS without compromising security.
Key Concepts
| Component | Role in Infrastructure |
|---|---|
| LXC (Proxmox) | Runs Docker and Immich services with low resource overhead |
| NFS Share | Stores terabytes of photos centrally and securely |
| UID/GID Mapping | Grants the unprivileged LXC safe write permissions over the NAS |
In my case, I have a fairly common scenario that can give you headaches if not planned well:
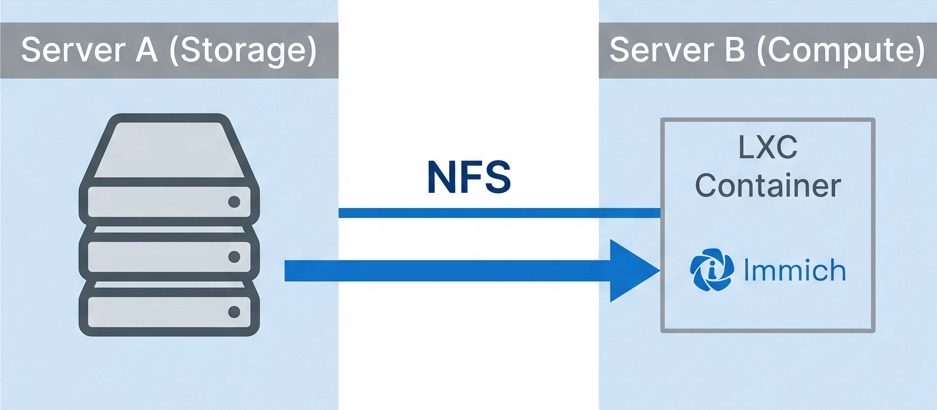
- Server A (Storage): A Proxmox node with a multi-TB
DATA-poolwhere I want my photos to live. - Server B (Compute): Another Proxmox node where Immich runs in an LXC container (installed using the wonderful ProxmoxVE Community Scripts).
The mission is clear: Immich (on B) has to read and write its data on Server A. And since I don’t have a Ceph cluster (yet), the most robust and standard solution is NFS.
But beware, here comes the “villain” of this story: Unprivileged LXC containers and their user mappings. If you’ve ever fought with a “Permission denied” in Proxmox, you know what I’m talking about.
Let’s solve it step by step.
The Solution Scheme
To keep you on track, here’s what we’re going to build:
- Server A: Exports
/DATA-pool/Immichvia NFSv4. - Server B (Host): Mounts that NFS at
/mnt/immich_nfs. - LXC Immich: Receives that mount at
/mnt/immich(or/photos) using “bind mounts”. - Immich: Happily writes to that path, believing it’s local.
Step 1: Configure Server A (The Warehouse)
First, we need our server with the disks to share the folder.
1.1 Install the NFS server
Log in via SSH to your Server A and install what’s necessary:
apt update
apt install -y nfs-kernel-server
systemctl enable --now nfs-server
1.2 Create the folder
If you don’t have it already, create the directory where your memories will live:
mkdir -p /DATA-pool/Immich1.3 Export with NFS
This is where we define who can enter. Edit /etc/exports:
nano /etc/exportsAdd the following line. Tip: Restrict access to Server B’s IP for security.
/DATA-pool/Immich IP_OF_HOST_B(rw,sync,no_subtree_check,root_squash)Apply the changes so the system knows:
exportfs -ra
exportfs -v
1.4 Firewall (Don’t forget this)
If you have the Proxmox firewall enabled, make sure to allow TCP traffic on port 2049 from Server B’s IP. Otherwise, you’ll go crazy thinking it’s an NFS problem when it’s just a simple network block.
Step 2: Configure Server B (The Proxmox Host)
Now we go to the server where the Immich container is running. Note: we are on the Proxmox host, not inside the LXC yet.
2.1 Install the NFS client
apt update
apt install -y nfs-common
2.2 Test Mount
Let’s see if it connects. Create the mount point and test:
mkdir -p /mnt/immich_nfs
mount -t nfs -o vers=4.2 IP_OF_HOST_A:/DATA-pool/Immich /mnt/immich_nfs
Try writing something:
touch /mnt/immich_nfs/test && rm /mnt/immich_nfs/testIf it didn’t give an error, congratulations! The NFS connection works.
2.3 Make it Persistent
We don’t want this to break if you restart the server. Add it to /etc/fstab:
IP_OF_HOST_A:/DATA-pool/Immich /mnt/immich_nfs nfs vers=4.2,_netdev,nofail,hard,timeo=600 0 0And verify that everything mounts correctly:
mount -aStep 3: Pass Storage to the LXC
Now we have the data on Host B, but the Immich container doesn’t see it. We need to “pass it” in.
Identify your container ID (CTID). Let’s say it’s 105.
In the Host B terminal:
pct set 105 -mp0 /mnt/immich_nfs,mp=/mnt/immichThis tells Proxmox: “Take what’s in /mnt/immich_nfs on the host and put it in container 105 at /mnt/immich”.
Enter the container to verify:
pct enter 105
ls -la /mnt/immich
If you see the files, we’re almost there. Only the final boss remains: Permissions.
Step 4: The “Delicate” Part (Privileged vs Unprivileged)
This is where people usually get stuck.
If your container is Privileged, life is easy. Usually, a chown 1000:1000 on Server A is enough, because the container’s root is the host’s root.
But if you use an Unprivileged container (which you should, for security), the root user inside the container is NOT the root user outside. It maps to a high UID (usually 100000). That’s why, even if you give 777 permissions, it sometimes fails or looks weird.
The Practical Solution: all_squash
To keep things simple without getting bogged down in subgid mappings (which could be an entire post in itself), the easiest way for this to work in a homelab is to tell the NFS server to treat all guests as a specific user.
On Server A, we edit /etc/exports again. We’re going to use all_squash and map everything to the anonymous user (or a specific one we control).
If you want Immich to be able to write without issues inside the LXC (which usually sees it as root or user 1000), a trick is to map to the UID Proxmox uses for its unprivileged containers (100000) or simply force a common user.
But to simplify as much as possible and avoid “permission denied” errors in a controlled environment, we can use this configuration in the exports of Server A:
/DATA-pool/Immich IP_OF_HOST_B(rw,sync,no_subtree_check,all_squash,anonuid=100000,anongid=100000)Note: UID
100000is what Proxmox usually assigns torootinside an unprivileged container. By doing this, when Immich writes as “root” inside the LXC, Server A will see those files as owned by user 100000, closing the circle of trust.
Apply the changes on A:
exportfs -raIMPORTANT: Adjust Folder Ownership
For the mapping to work, the folder on Server A must belong to user 100000 (or whichever you defined in anonuid). If root created it, Immich won’t be able to write even if NFS lets it through.
Run this on Server A:
chown 100000:100000 /DATA-pool/Immich
chmod 770 /DATA-pool/Immich
Option B: Convert to Privileged
If this gives you too many headaches and you prefer stability over strict isolation, you can back up your LXC, restore it, and check the “Privileged” box. There, permissions work like in a normal Linux: chown 1000:1000 at the source and you’re done.
Final Recommendation for Immich
An important detail: use NFS only for photos and videos (the “Library” and “Uploads”).
The Immich database (Postgres) should live on the local disk of Server B (or on the LXC’s virtual disk). Databases over NFS can be slow and prone to corruption if the network falters.
Security Reminder: Moving data to a NAS or dedicated server (Server A) doesn’t mean it’s safe. A RAID is not a backup! Make sure you have a 3-2-1 strategy for your photos, copying them to another location or the cloud.
Success Checklist Summary
If something fails, check this:
- On B (Host):
mount | grep immich_nfsIs it mounted? - On A:
exportfs -vIs the correct IP exported? - Ports:
telnet IP_A 2049from B. Does it connect? - Permissions: If you see the files but can’t write, check the UID mapping in
/etc/exports(all_squash).
And that’s it! You now have your Immich spread across two machines, scaling cheap storage on A and using CPU/GPU power on B.
Perfect. With this, you’ll have your Immich instance running on Proxmox with NFS storage, combining the best of both worlds: computing power and storage capacity. Quick, robust, and scalable.
And as I always like to say: If this post has helped you, share it with other administrators who can benefit. And follow me for more real experiences from the homelab trenches.